This is the first post in a series of posts regarding the setup of a Redigate IoT Gateway. I purchased a couple a few months ago and have finally gotten around to playing with them.
Out of the box the Redigate is almost ready to go. If you follow the quick start documentation provided you will be up fairly quick. Here is just a quick overview of a few settings you will want to tweak to make the unit work better for you. Also some tips for Ethernet configuration at the bottom of the article.
Basic
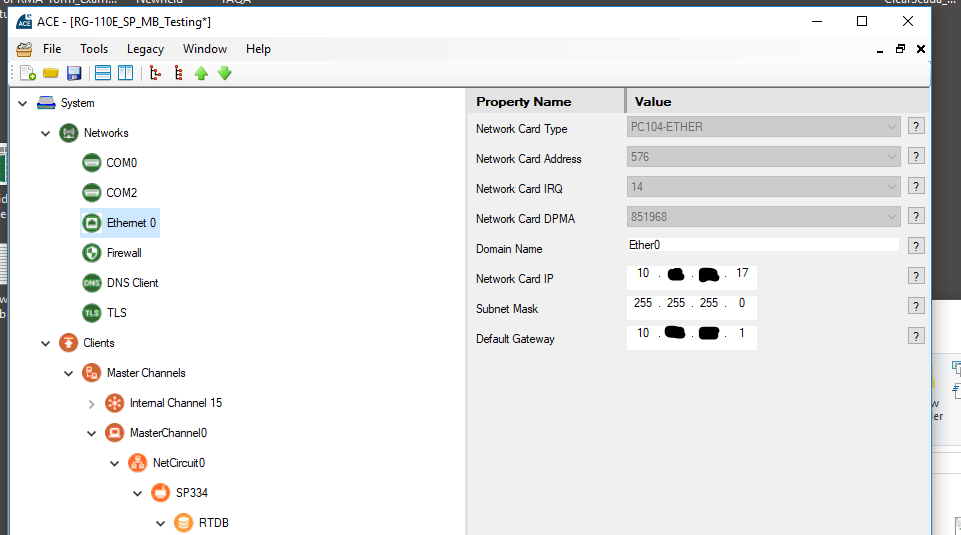
- Setup the network, assign an IP, assign a gateway (or the internet functions might not work)
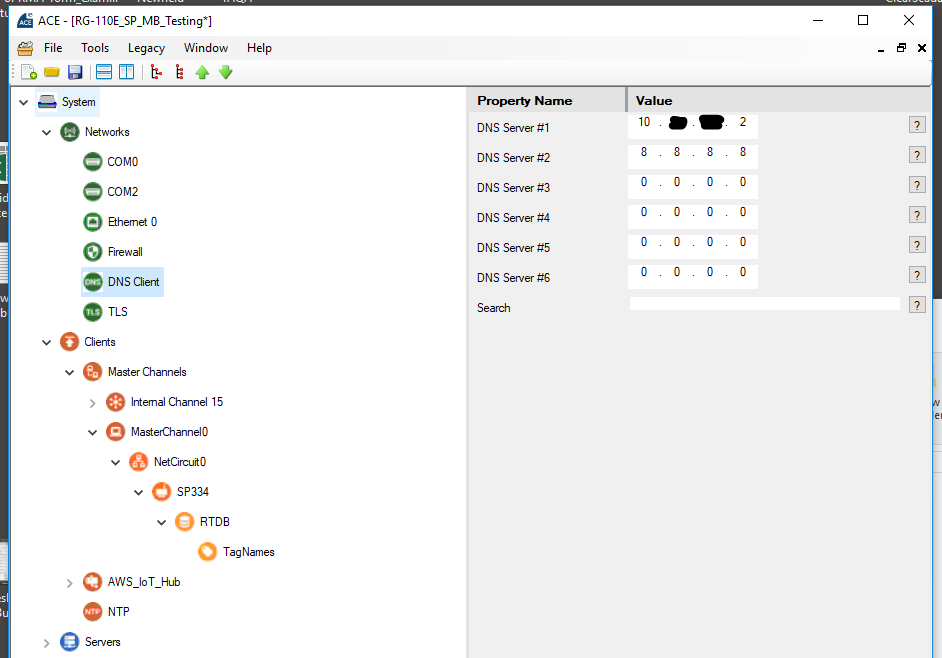
- Add DNS (useful for publishing to Azure, AWS, or a global MQTT broker hosted in the cloud or on-premise). The setup depicted is for an on-premise DNS setup with fail over to Google’s DNS.
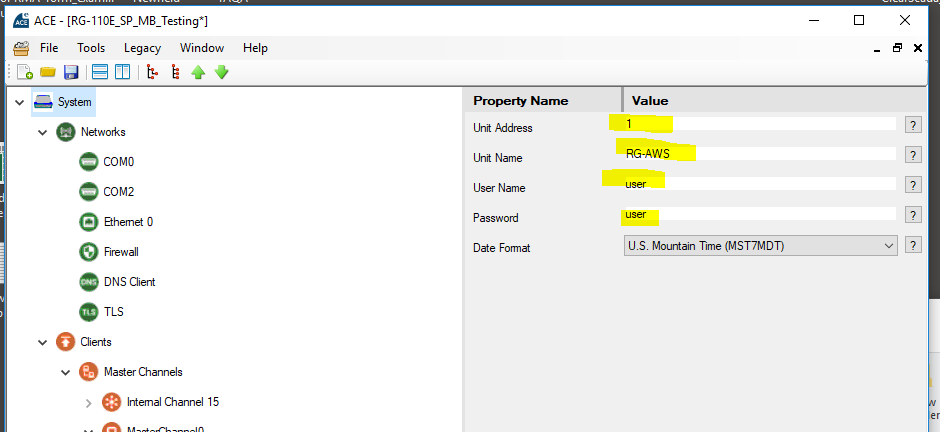
- Configure the Unit Address, Gateway Name, User name, and Password. Since this is a tiny Linux computer make sure you do not use the default user/password for production.
Advanced
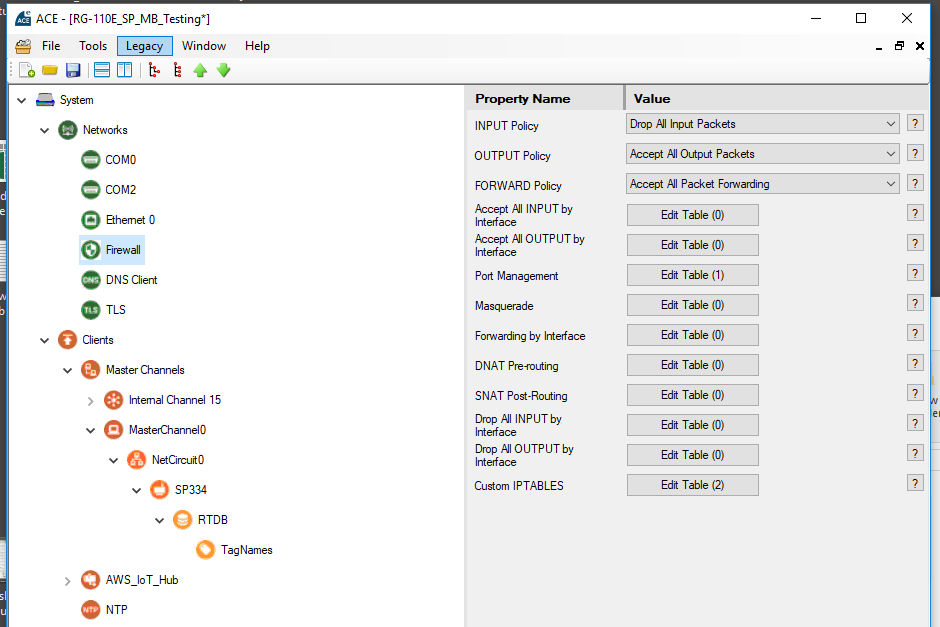
- Customize the Firewall. Under the hood it is Linux iptables so there is a lot of Firewall horsepower there available to be used.
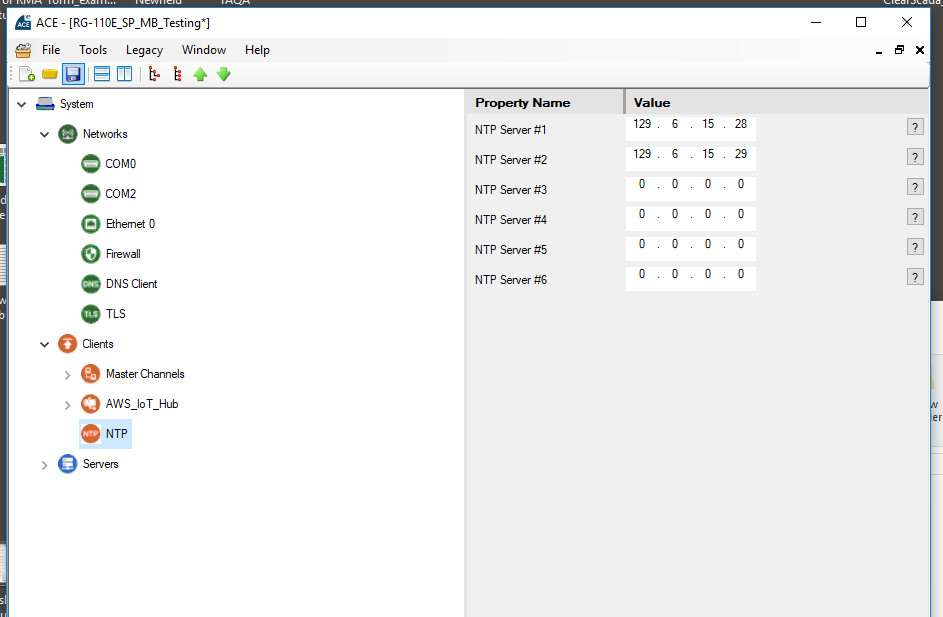
- Add NTP client under the Clients section. This will be needed to sync the clock of the unit if you do any TLS encryption or publishing to external services with time stamps. Use your own internal NTP server or external ones (these are the default, I think they map to pool.ntp.org, but I haven’t checked).
Uploading to the Redigate
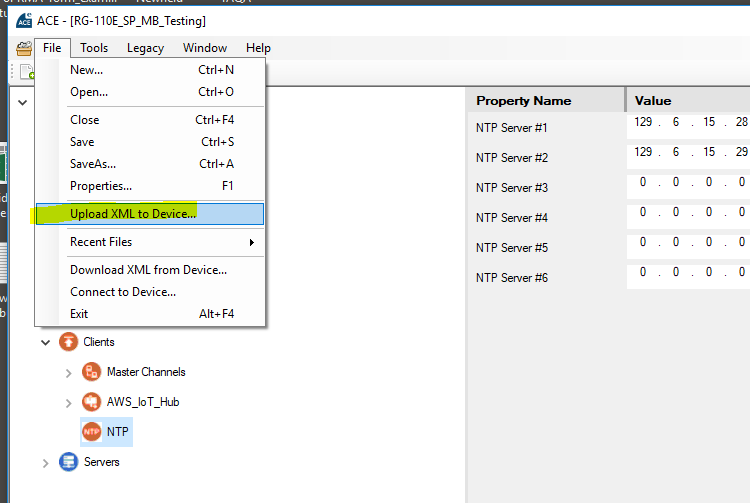
Once you have that all configured you can upload to the unit. Click on over to File -> Upload XML to Unit in the ACE software.
Then enter the port, password, IP and username information. The defaults will work out of the box.
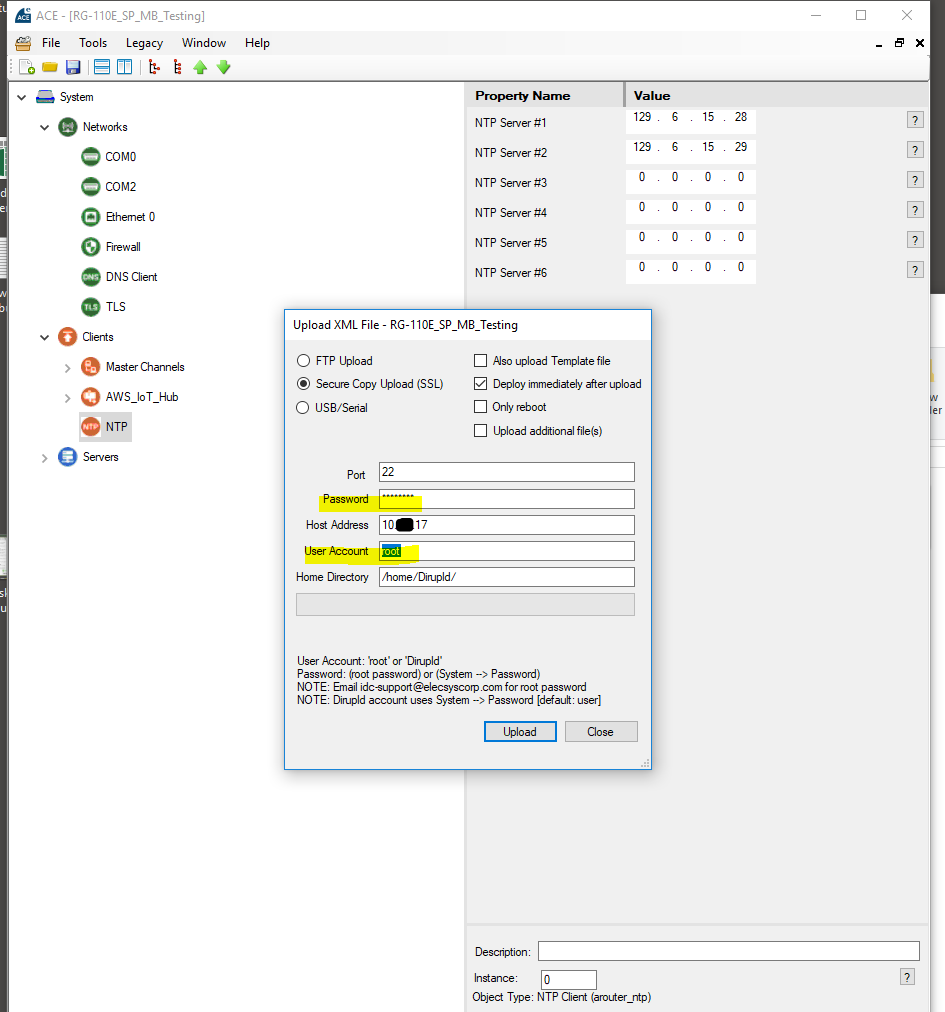
Note: If this is a brand new unit and you are connecting via Ethernet you may have to contact Elecsys tech support to obtain the default root password. I notice Elecsys has not published the information on their site so I won’t post it here (although I know what the default is!). They might benefit from putting this default root password on a slip of paper in the box, or put it on the printed instructions. Once this configuration is uploaded you can ssh into the box using Putty and change the root password like you would normally for Linux computers. Cyber security tip: CHANGE THE DEFAULT PASSWORDS