This is slowly coming… the need to secure our SCADA web clients. What follows are some configuration tricks for getting WebX secure and also enabling the ‘new’ WebX to talk properly to ‘original’ WebX for the purposes of client ease of use (mostly to let them have full Mimics and Maps at the same time).
So in your server configuration, this is pretty easy and straightforward. Just open up the server configuration from your server icon, login to the server you want to edit, navigate down to System->WebX. Change the port config so HTTP is off and HTTPS is on port 453 (we are going to put ‘new’ WebX on port 443).
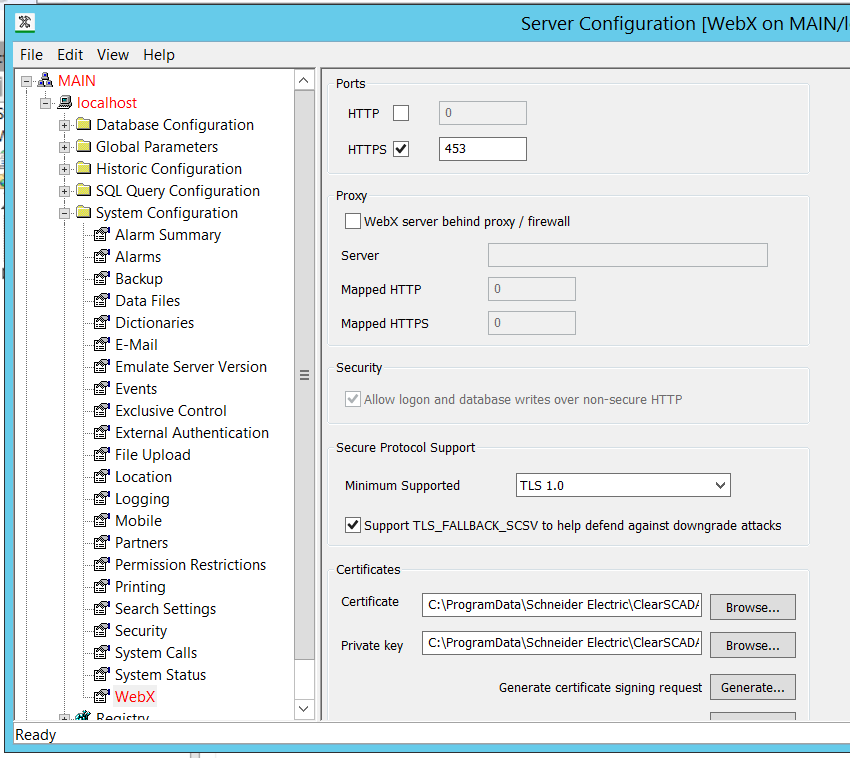
Apply those changes. You should not need to restart ClearSCADA, but do that if you want to.
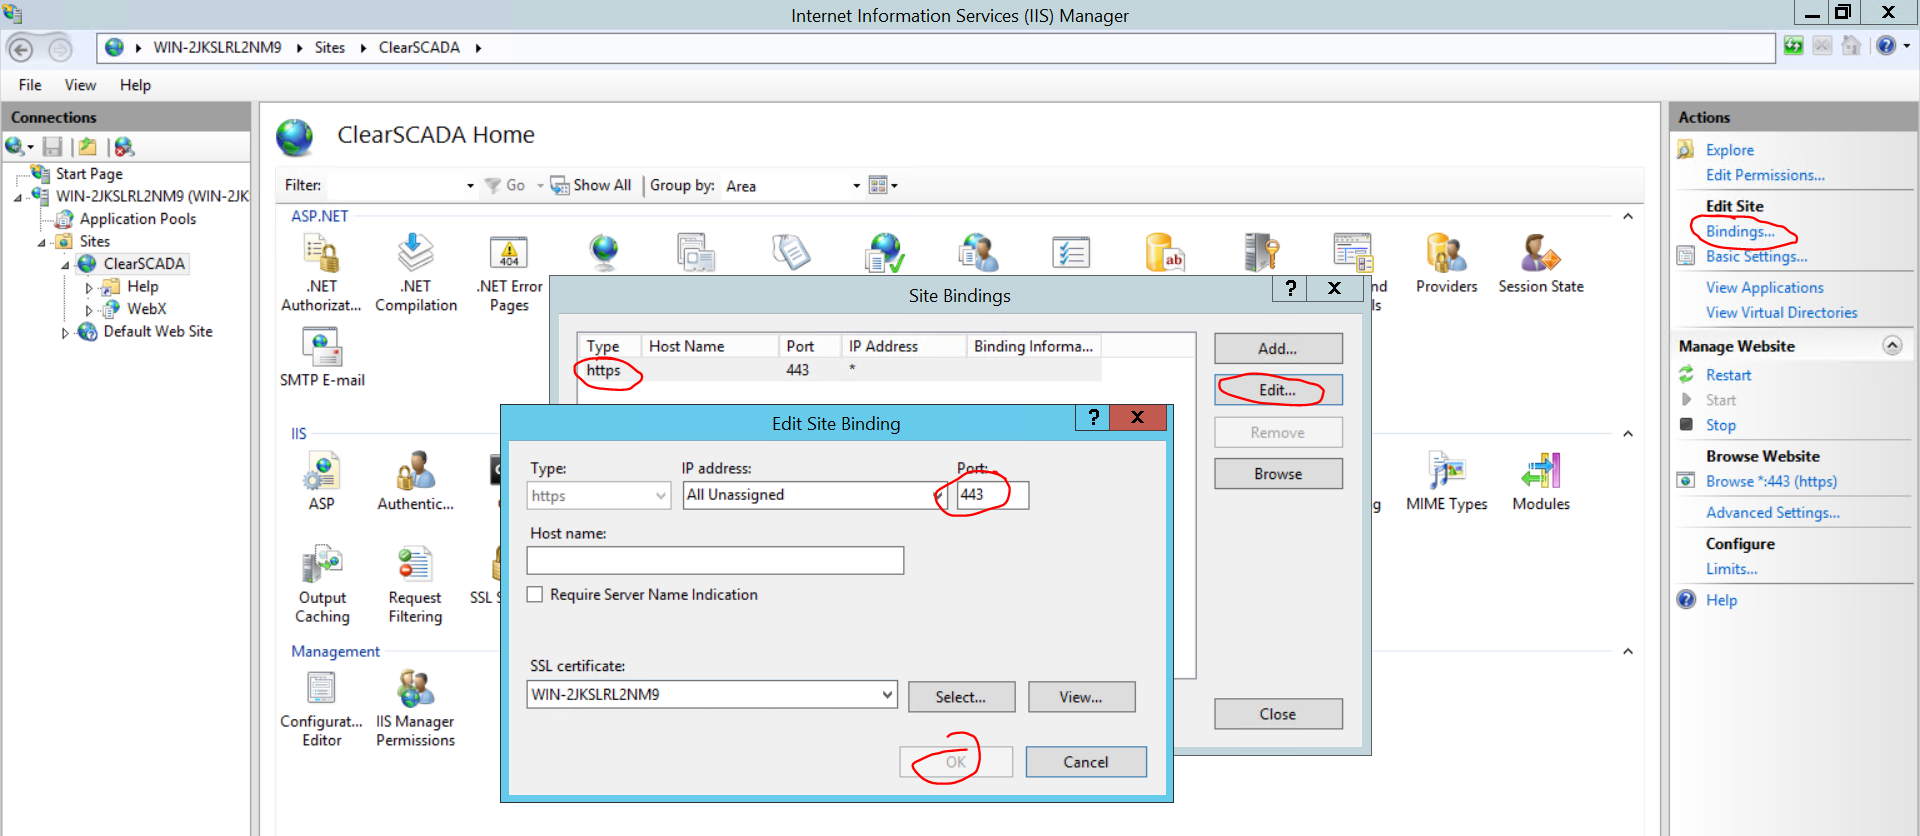
Now we are going to get dirty with Windows IIS. This assumes you installed the ‘new’ WebX with ClearSCADA. Open up the IIS Manager. Navigate to the ClearSCADA Site, then click over on Bindings…. I removed the HTTP binding (I don’t want people accessing over non-secure web connections). Then I changed the HTTPS binding from 453 (the default) to 443.
Not done yet. That gets almost everything lined up just right. The IIS component and the ‘original’ WebX component talk to each other in the background to enable mimic display in ‘new’ WebX. We need to tell the IIS component where we put the connections to ‘original’ WebX.
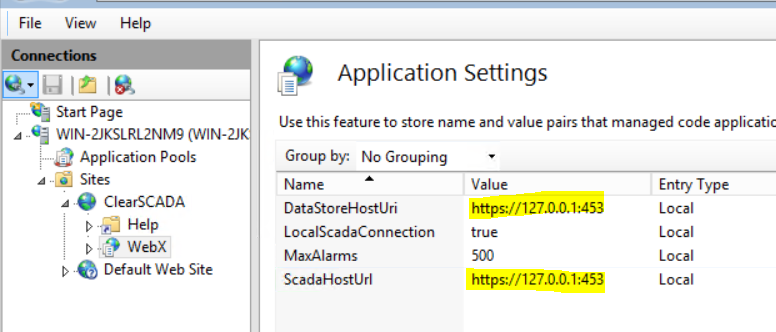
Navigate in IIS to the WebX component under the ClearSCADA site. Double-click on Application Settings (in the middle of the top section).

Change the DataStoreHostUri and ScadaHostUrl to “https://127.0.0.1:453” to get IIS talking properly to the ClearSCADA internal web server.
If you are really keen you can update your SSL certificates and get that going properly. For basic dev/testing the self-signed certificates will likely serve you well.
Enjoy!